Thanksgiving off grid workshop making candles!
Thanksgiving off grid workshop making candles!
 Living off grid for most means solar power for light to see when darkness falls and solar means sun. But when living in norther or southern latitudes the sun does not visit long and is often obscured by snow, rain, or a few clouds. We can not rely totally on solar and so we become creative to stay out of the dark. On this Thanksgiving day we went to the office/workshop to make candles. No, for us this is not work but only the beginning of Thanksgiving day in the mountains of northern Idaho. Follow along for our tip on how to create your own light.
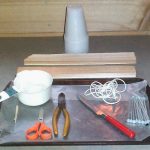
The list is short for what it takes to make your own candles. Your list may very from ours and may change each time you make candles but the basics always remain the same. What you will need….
 Paraffin wax
Wick
Melting pot
Nails
Cookie sheet
Wax paper
Scissors
Plastic cups 6, 8, 10, or 12oz
 Paraffin can be inexpensive when buying in bulk. 50lb quantity will generally run just over a 1.50 a pound but will produce many large candles at a fraction of the cost of buying off shelf. 50lbs = 120 8oz candles. 120 of these candles could easily run several hundred dollars when purchasing at the local grocery store. The candles we will be making are 8oz.
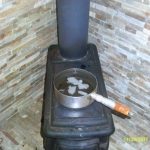 Use an old pot to melt your wax and save the pot only for melting wax. Do not use your pot for any other purpose than melting wax. Place chunks of paraffin within the pot careful that as it melts it will not overflow. It does not require a lot of heat to melt the wax and is easy to add more as you go.
 While your wax is melting prepare your molds (plastic cups) for pouring. I prefer to use two cups stacked. This make less flimsy and easier to handle. Use a pointed object, nail, knife, or if you have electricity a drill to place a hole no bigger than your wick through the center of the bottom of cups. Thread your wick through the hole and tie to a nail on either side as shown in picture.
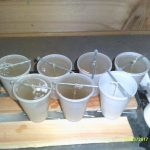 Once your molds are complete cover a cookie sheet (works well) with wax paper for protection from spills. Lay short, narrow strips of wood on cookie sheet allowing enough space between each to accommodate nail in the bottom of cup allowing cup ti sit flat. See pic to right. Once all cups are in place fill with melted wax using ladle or similar tool.
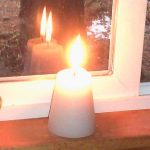
A small amount of wax may leak from bottom hole you drilled and wax may settle as it drys. Top off cup as needed. Allow time for wax to thoroughly dry before using scissors to cut string tied to nails and cut away plastic cup. These 8oz candles I made will burn about 8 hrs.
Candles light making candles off-grid Thanksgiving Thanksgiving off grid workshop making candles workshop